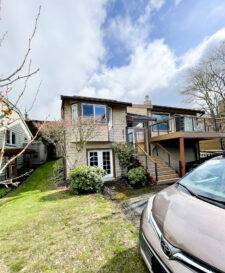
 Sudden Valley Exterior
 Building New in Columbia? Your Windows Need to Match the Climate You're Building Into
If you're framing a new home or a major addition in the Columbia area near Sudden Valley, the window package you choose and how it's installed will do more to determine your comfort, energy bills, and long-term maintenance than almost any other single decision on the job. New construction gives you one real advantage over a retrofit: the window opening isn't finished yet. That means flashing, house wrap integration, and drainage planes can be done correctly from the studs out, instead of worked around after the fact. It's the one chance to get this right without cutting into existing siding or drywall.
Whatcom County's marine climate is not gentle on building envelopes. Homes near Sudden Valley and the Columbia area deal with salt-laden air off the Sound, long stretches of driving, wind-blown rain in the fall and winter, and a moss season that can run the better part of the year on shaded north- and west-facing walls. New-construction windows here need to be selected and installed with all of that in mind from day one — not treated as a generic product drop-in.
What Columbia's Climate Actually Demands From a Window Install
Salt Air and Corrosion
Proximity to Bellingham Bay and the broader Salish Sea means airborne salt reaches further inland than most homeowners expect, especially on exposed or elevated lots. Salt air accelerates corrosion on hardware, fasteners, and lower-grade metal components. It's a slow process, but it's relentless — and it's one of the reasons we're particular about the fastener and flashing materials that go around every window opening, not just the window unit itself.
Driving Rain
Wind-driven rain doesn't fall straight down — it hits walls sideways, gets forced under trim, and finds any gap in a flashing sequence. A window that's watertight when tested with a garden hose can still leak in a real Whatcom County storm if the flashing laps aren't sequenced correctly (each layer shingled over the one below it, so water is always directed outward and down). This is a new-construction-specific advantage: we control every lap before siding ever goes up.
Moss and Sustained Moisture
Shaded, north-facing walls in this area stay damp for months at a time. Moss and algae don't just grow on roofs — they colonize any surface that holds moisture, including window sills, trim, and the caulk lines around openings. Sustained dampness is what breaks down inferior sealants and wood trim over time. Material choice and sill drainage detailing both matter more here than they would in a drier climate.
What a Correct New-Construction Window Install Actually Involves
"New construction" as a window type refers to units with a nailing fin, installed before siding goes on — as opposed to "replacement" or "pocket" windows, which are retrofitted into an existing finished opening. The nailing fin approach is the right method for new builds because it lets us integrate the window directly into the wall's water-management system rather than caulking around the outside of an existing frame.
The Sequence That Matters
- House wrap or building paper installed and lapped correctly before window rough openings are addressed
- Sill pan flashing installed at the bottom of the opening, sloped to drain outward — this is the single most important detail for keeping water out long-term
- Window set into the opening, shimmed level and plumb, and fastened per the manufacturer's specified pattern
- Nailing fin flashed with side flashing first, then head flashing last, each lapped over the layer below
- House wrap integrated back over the head flashing to complete the drainage plane
- Interior air sealing with low-expansion foam or backer rod and sealant — gaps left unsealed are a direct path for both drafts and moisture-laden air
Skip or reverse any step in that sequence — especially the sill pan or the flashing lap order — and you've built a leak into the wall that may not show up for years, usually as hidden rot rather than a visible drip.
Choosing the Right Window Package for This Area
There's no single "best" window brand for every home — the right choice depends on your budget, the home's exposure, and how much long-term maintenance you want to take on. What we can tell you honestly is how different frame materials tend to perform in this specific climate.
| Frame Material | How It Handles Salt Air & Moisture | Maintenance | General Cost Position |
|---|---|---|---|
| Vinyl | Won't corrode; performs well in coastal air | Low — occasional cleaning | Most affordable |
| Fiberglass | Excellent — dimensionally stable, resists moisture and salt exposure | Low | Mid to upper range |
| Aluminum-clad wood | Good exterior protection, but any breach in the cladding exposes wood to sustained moisture | Moderate — watch seams and joints | Upper range |
| Bare wood | Requires diligent upkeep in a wet, mossy climate; most exposed to rot risk | High | Varies, ongoing cost adds up |
We typically steer new-construction clients in this area toward vinyl or fiberglass frames for most elevations, particularly on shaded or exposed walls where moss and driving rain are most persistent. That's not a knock on wood or clad-wood windows — they have real appearance advantages — it's a matter of matching material to exposure and being upfront about the maintenance commitment each option carries.
Glass Package Considerations
For this climate, we generally recommend double-pane units with a low-E coating rated for our heating-dominant climate zone, plus argon gas fill for improved insulating value. Triple-pane glass is worth discussing on north-facing walls or homes with higher energy targets, though it adds cost and weight that should be weighed against your specific goals.
Our Process on New-Construction Projects
Because we work regularly in the Sudden Valley and Columbia area, we coordinate directly with the builder or general contractor's framing schedule so windows arrive and get set at the right point in the build — not too early, when the opening dimensions might still shift, and not so late that it holds up the siding crew.
- Verify rough opening sizes against the ordered window schedule before units arrive on site
- Confirm house wrap and sill pan flashing plan with the framer or GC before install day
- Install sill pans and flashing in the correct shingled sequence on every opening
- Set, shim, and fasten each window per manufacturer spec — not "close enough"
- Air-seal the interior perimeter before insulation and drywall close up the wall
- Walk the full window schedule with photos documenting flashing before it's covered by siding
That last step matters more than it sounds like it should. Once siding goes up, the flashing work is hidden for the life of the house. Documenting it while it's still visible protects you if a warranty question ever comes up down the road, and it's a habit we don't skip regardless of how the schedule is running.
Why It Matters That We Already Work in Columbia
A crew that's only seen a handful of Whatcom County builds will approach flashing and sealant choices the same way they would in a drier inland climate — and that gap shows up as callbacks, not on install day. Working regularly in Sudden Valley and the surrounding Columbia area means we already know which elevations on a given lot tend to catch the worst of the driving rain, how much shade a north wall is likely to hold through the year, and which sealant and flashing products actually hold up under sustained coastal moisture rather than just passing a spec sheet. That local pattern recognition is hard to replicate from a general contractor's playbook alone.
It also means we're not guessing at code requirements or inspection expectations for the county — we know what local building inspectors are looking for on flashing and weatherproofing details, because we've been through that inspection process here before.
Common Mistakes We See on New-Construction Window Jobs
Most window problems on new builds trace back to a small number of repeated errors, usually from crews rushing to keep pace with a framing schedule:
- Skipping or improvising the sill pan flashing instead of using a dedicated sloped pan
- Flashing laps installed out of sequence, so water gets directed behind the layer meant to stop it
- Over-relying on caulk or sealant tape to do a job that proper flashing sequence should be doing structurally
- Fasteners or hardware not rated for coastal exposure, leading to premature corrosion
- Interior air gaps left unsealed, which show up later as drafts and condensation on the frame
Every one of these is avoidable with a correct sequence and materials matched to the exposure — but every one of them is also expensive to fix after siding and drywall are finished, which is exactly why getting it right during the new-construction phase matters so much.
Planning Your Window Order and Timeline
Window lead times vary by manufacturer and package complexity, and they can be a common source of schedule delays if not planned early. We recommend finalizing your window schedule — sizes, styles, glass package, and hardware finish — as early in the design process as possible, ideally before framing is complete, so the order is placed with enough lead time to avoid holding up the siding and exterior trim crews.
If you're still finalizing plans, we're glad to walk through window placement and package options with you or your builder before the order is locked in. Catching a sizing or exposure issue on paper is a lot cheaper than catching it after the opening is framed.
Get a Free Estimate for Your Columbia-Area New-Construction Windows
If you're planning a new build or major addition in Sudden Valley or the surrounding Columbia area, we'll walk your plans with you, talk through frame and glass options suited to your home's exposure, and give you a straightforward, no-pressure estimate. Reach out through the form below to get started.